
Centaur DICOM Viewer 101
DICOM data is loaded using then Centaur DICOM viewer.
DICOM Viewer Features
Tools
The Centaur DICOM viewer offers the following tools while labeling:
- Measuring tools (e.g., length, bidirectional, ellipse, annotation). Note: This information is not saved when submitting a case
- Zoom
- Pan
- Window leveling
- Undo / Redo
- Reset view
- Rotate right
- Flip horizontal
- Image slice synth
- Reference lines
- Stack scroll
- Invert
- Cine
- DICOM tag browser
- Window level region
- SAM (available for pixel and polygon segmentation only). Select the lightning bolt icon, then draw a box around your desired finding to initiate auto-segmentation.
- Select Propagate to have predictions from SAM across a specified range of slices
- Adaptive brush (available for pixel segmentation only)
Polygon Editing Options
After drawing a polygon annotation in the Centaur DICOM Viewer, you can refine its shape by adding or removing individual points. This allows you to adjust polygon boundaries without redrawing the entire annotation.
Adding points to a polygon
To add a new point to an existing polygon, hold down a modifier key and click on the polygon's edge where you want the new point placed.
- macOS: Hold Option (⌥) + click on the polygon line
- Windows: Hold Alt + click on the polygon line
When you click on the line between two existing points, a new point is inserted at that location. You can then drag the new point to adjust the polygon boundary as needed.
Removing points from a polygon
To remove an existing point from a polygon, hold down the Ctrl key and click on the point you want to remove. This works on both macOS and Windows. The polygon automatically redraws to connect the remaining points after removal.
Quick reference
- Add a point: Option (⌥) + click on line (macOS) or Alt + click on line (Windows)
- Remove a point: Ctrl + click on point (macOS and Windows)
Video demo
For a walkthrough of these editing options in action, watch the polygon editing demo video.
Tips
- When adding points, click directly on the line segment between two existing points, not in empty space.
- When removing points, click directly on the point itself, not on the line.
Layouts
Advanced layout offerings include MPR, 3D four up, 3D main, Axial Primary, 3D only, 3D primary, Frame View
You can enable crosshairs by data viewing in MPR.
Hotkeys
View hotkeys by selecting the settings icon in the top right hand corner, then selecting Preferences
Customize your own hotkeys, by entering your desired hotkey for each item and then selecting Save or use the default values.
Labeler View
In labeler view, findings are submitted as individual reads on a case. Reads can be aggregated to form a correct answer. Access labeler view by going to Add labels, then Web labeling, then select the box containing Web Labeling.
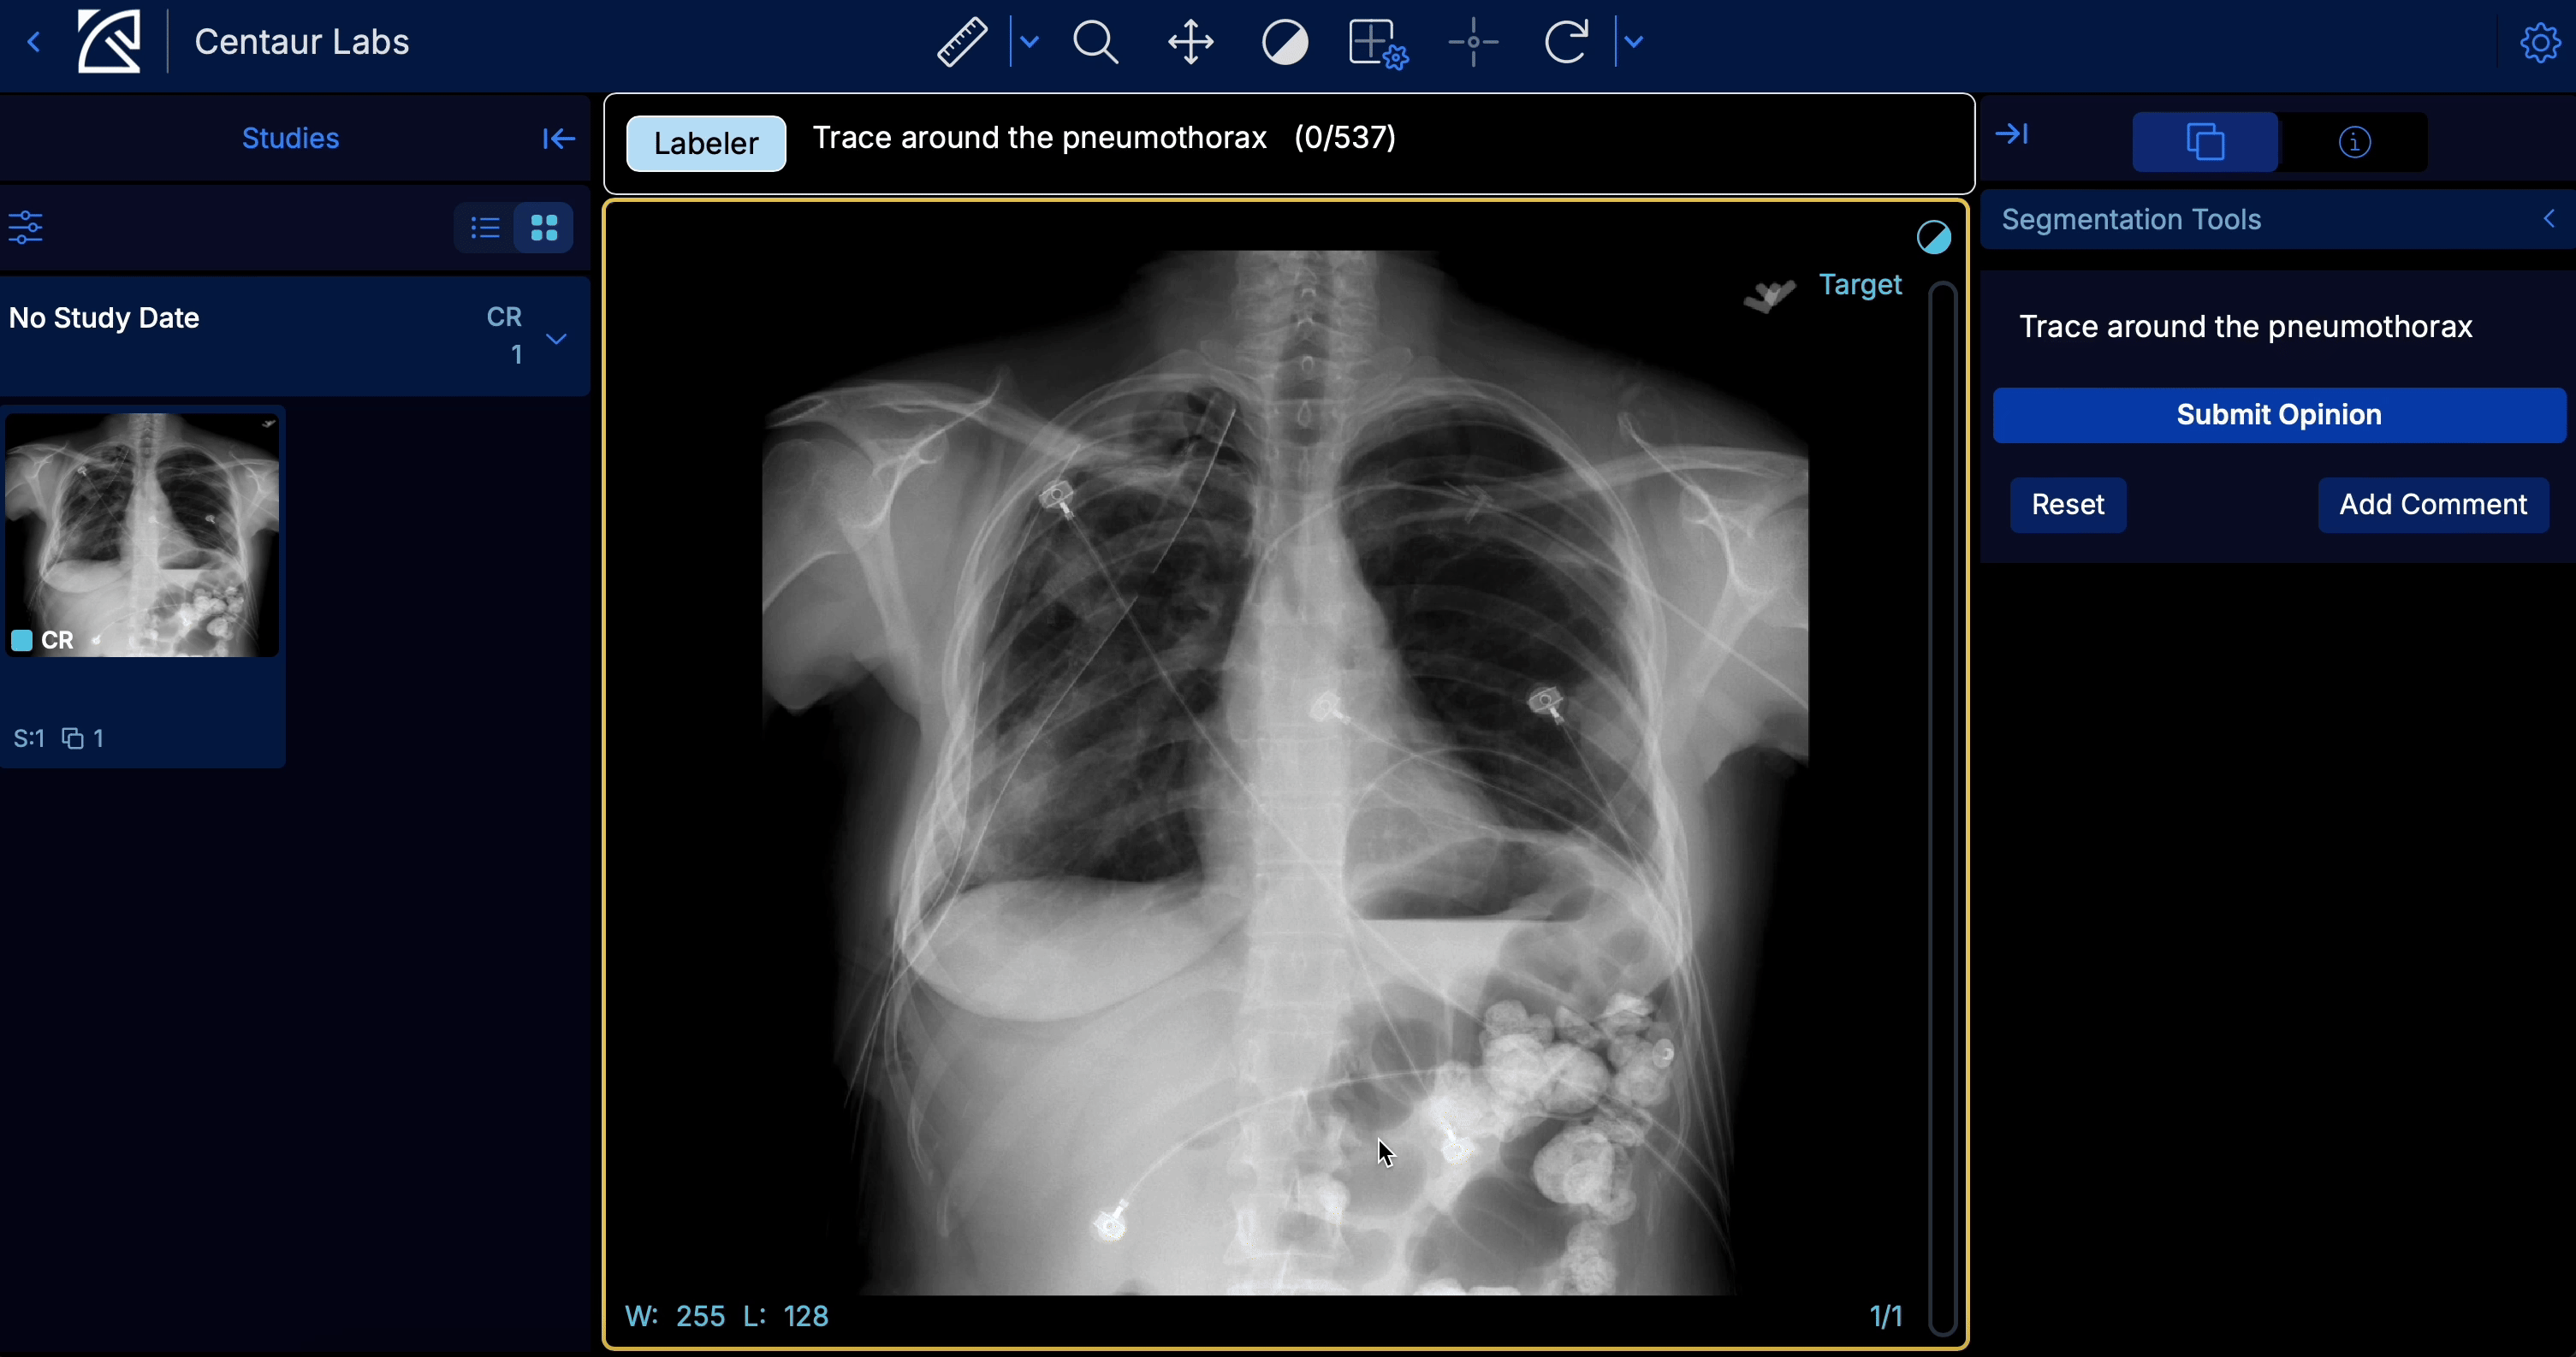
Box, Circle, Line and Polygon Segmentation
Under Segmentation Tools on the right side bar, select the pencil icon. once your icon is selected draw you annotation
_Note: For polygon segmentation, we offer polygon and contour tools. Thesculptor tool is used to modify contour and polygon segmentations. Once the sculptor tool is selected, click and hold your mouse while touching the shape to edit the segmentation. To adjust the size of the sculptor tool, touch the shape you wish to modify while not clicking and holding your mouse. Drag your finger towards the shape to make the counter smaller, and away from the shape to make it larger.
Select Add Comment to add a comment that will be submitted when you submit your read.
(For polygon segmentation only) Select the lightning bolt icon, then draw a box around your desired finding to initiate auto-segmentation.
- Select Propagate to have predictions from SAM across a specified range of slices
To delete an annotation, use a right (windows) or two finger click (Mac).
Select Reset to reset all annotations made by you in this labeling instance.
Select Submit Opinion once you've created your label, then hit Load Next Problem to navigate to the next case
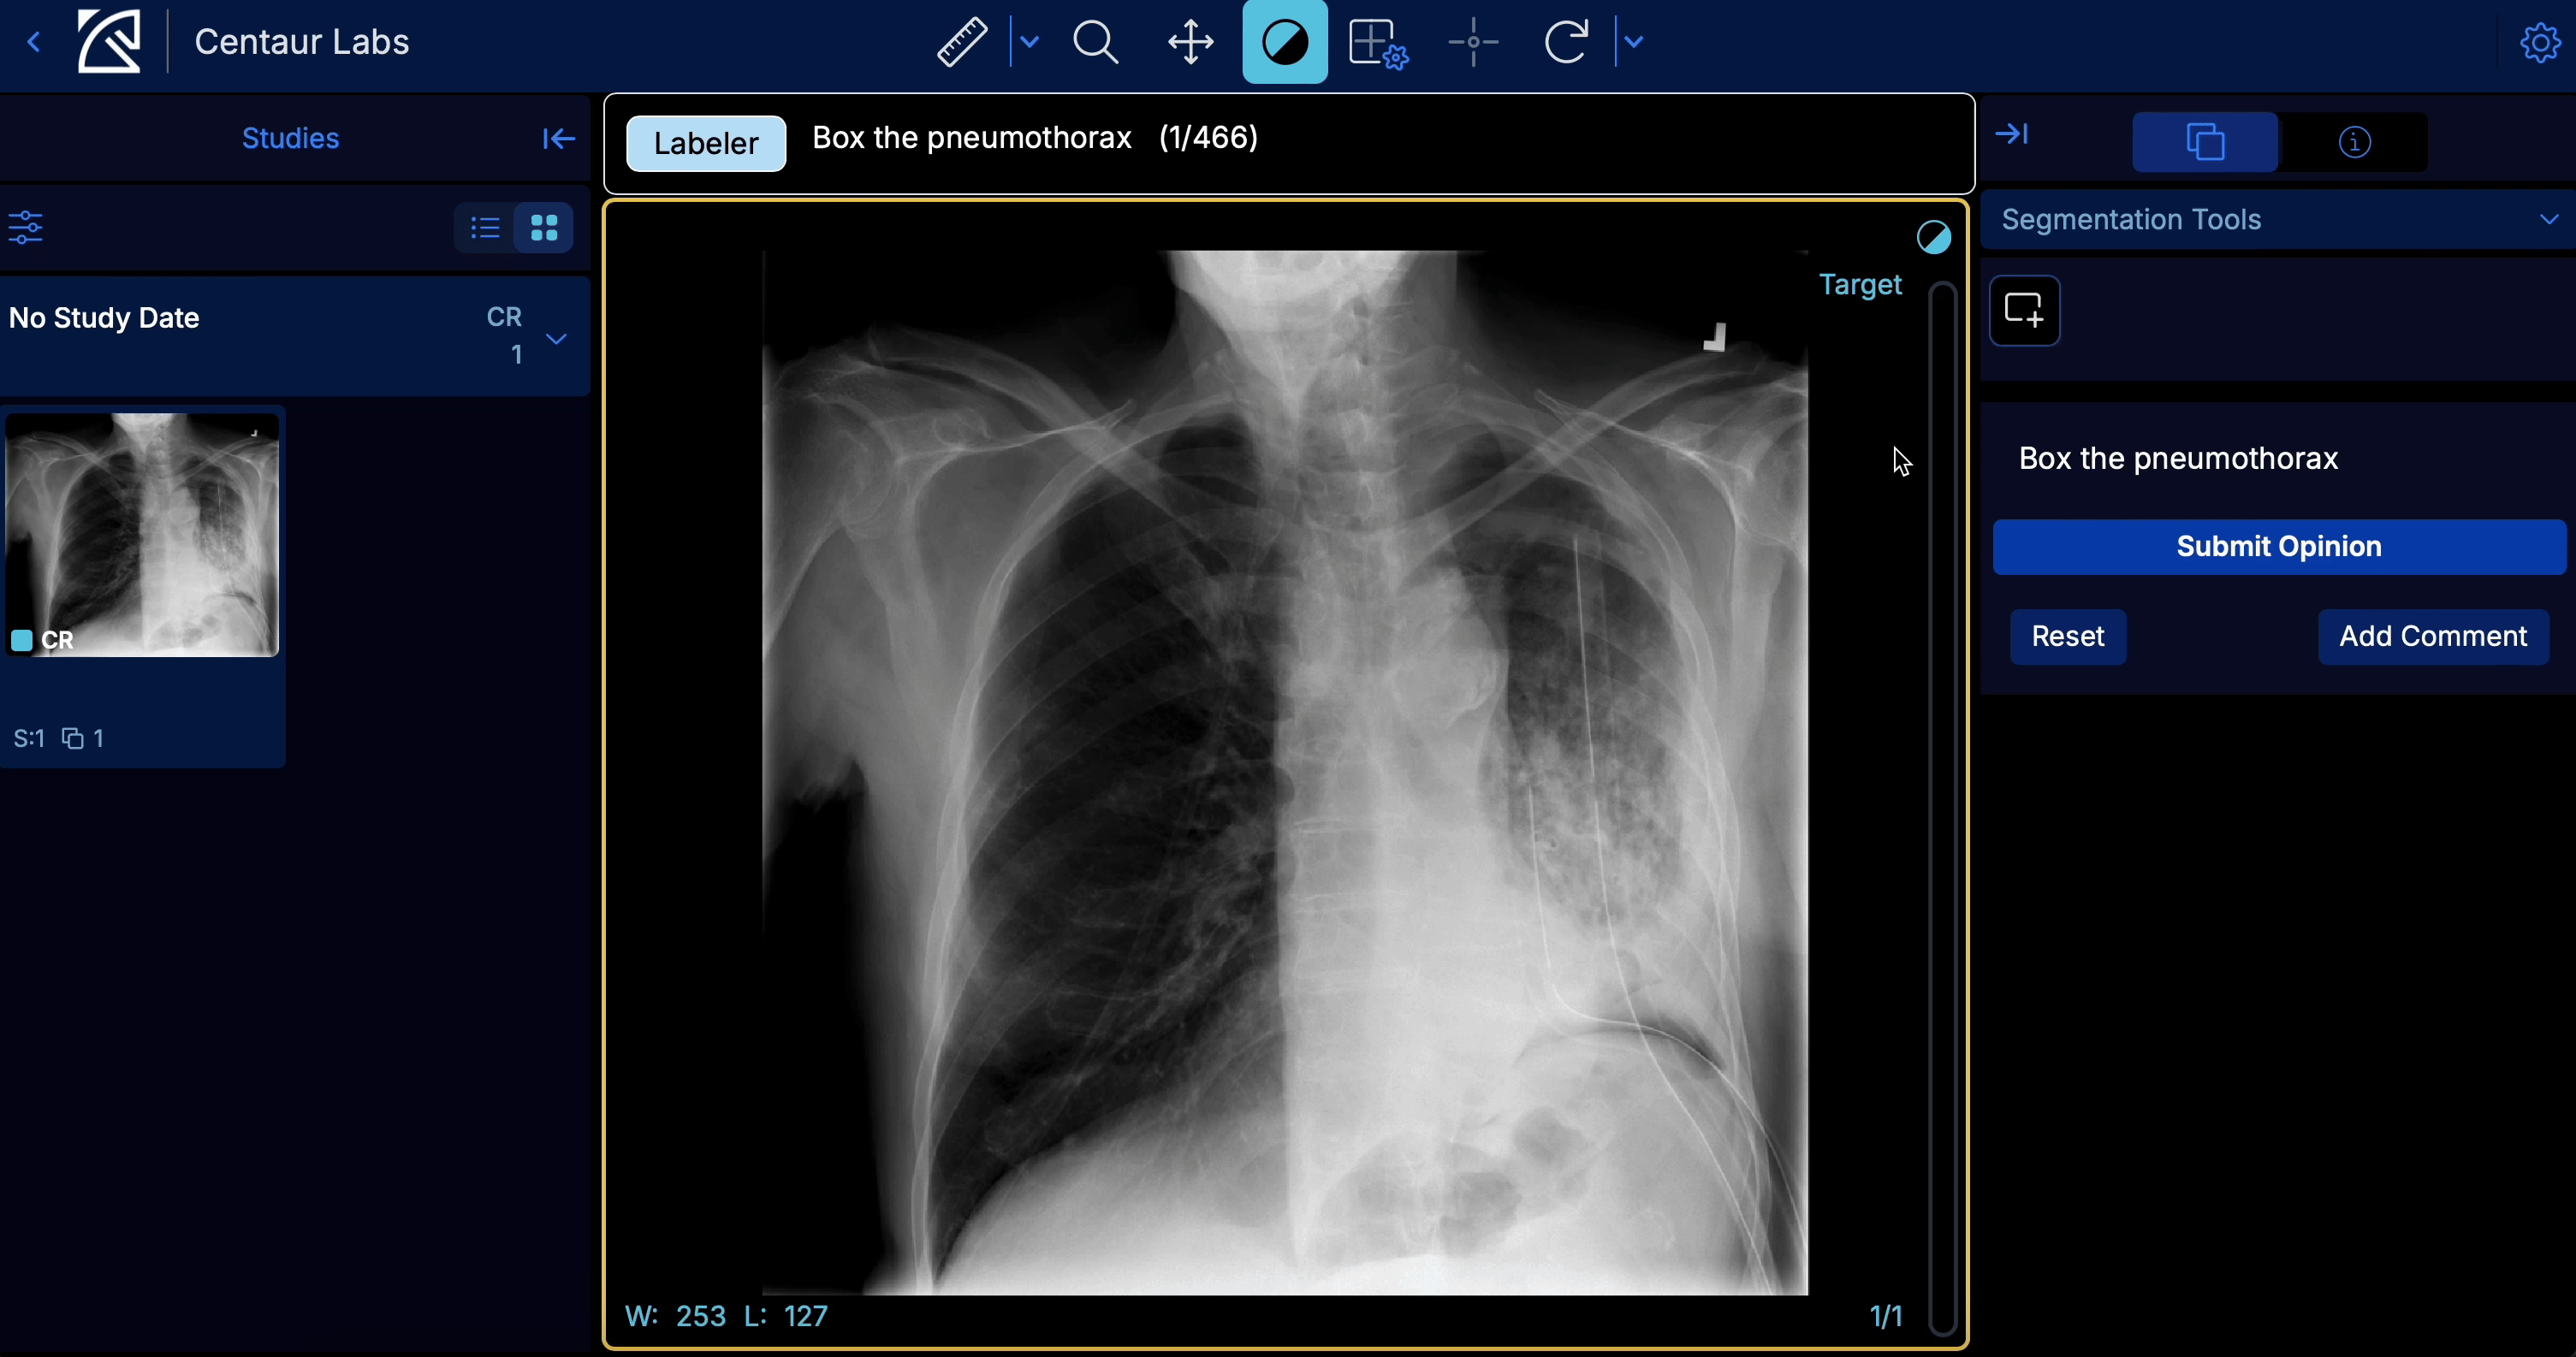
Box segmentation in labeler view
Pixel Segmentation
Under Segmentation on the right side bar, select + Add Classes. Once you've selected your class, then under Segmentation Tools select the brush icon.
Adjust the Shape to Circle (2D) or Sphere (3D). Adjust the brush size using the Radius. Then begin drawing your annotation.
You can also:
- Erase your segmentations by selecting the eraser icon
- Use the Threshold Tool (line icon) to automatically select pixels that fall within specified intensity thresholds and create segmentations based on pixel values rather than requiring manual tracing. This is useful for useful for isolating anatomical structures that have distinct density or intensity characteristics
- How to use it: Position the tool (mouse pointer) on an area of interest in the medical image. The tool analyzes the pixel intensities in that region. It creates a boundary that includes connected pixels meeting the threshold criteria. The result is a segmented region.
- In Dynamic Mode: The thresholds adjust automatically based on where you click. The tool examines the local neighborhood of pixels around your cursor. It creates adaptable boundaries that work well for structures with varying intensities.
- In Range Mode: The user sets specific minimum and maximum intensity values. All pixels within that fixed range throughout the image are selected. This creates consistent segmentation across the entire image
- Use Shapes (shapes icon) to apply a specific shaped annotation.
- Use Smart SAM (lightning bold icon) for auto-segmentation.
- Select Propagate to have predictions from SAM across a specified range of slices
- Reset all your annotations by selecting Reset. This resets all annotations made by you in this labeling instance.
Select Add Comment to add a comment that will be submitted when you submit your opinion.
Select Submit Opinion once you've created your label, then hit Load Next Problem to navigate to the next case.
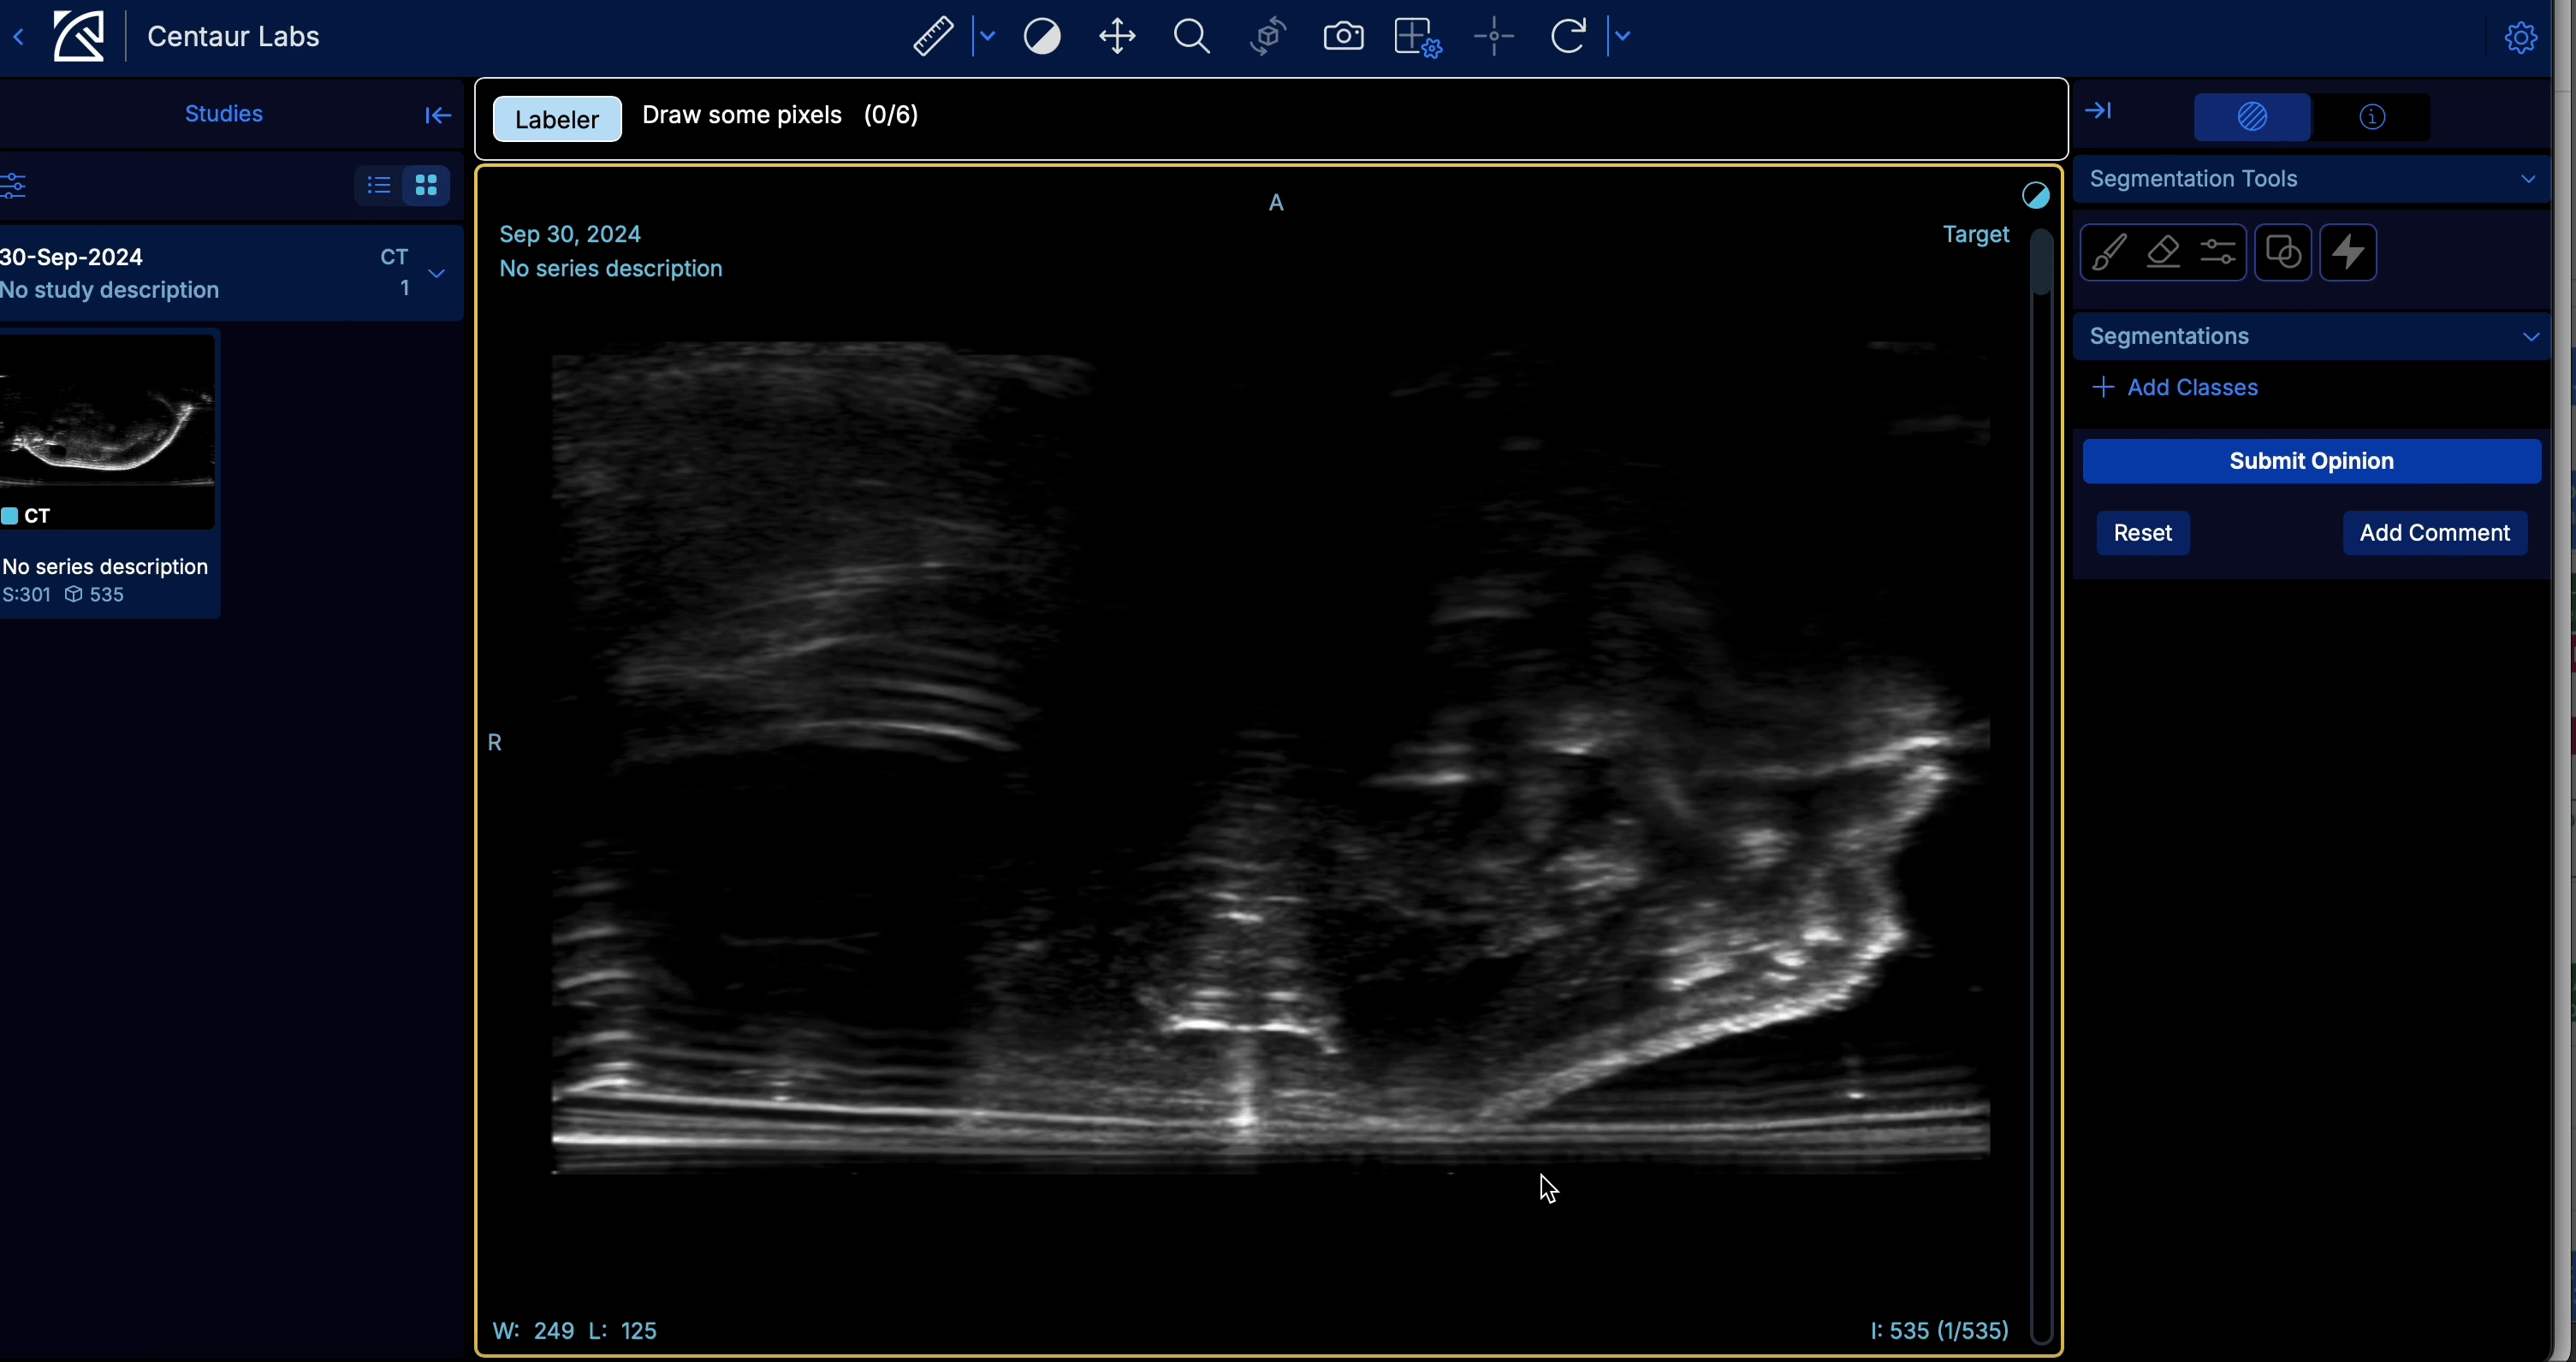
Pixel segmentation in labeler view
Arbitrator View
In arbitrator view, any segmentations submitted on the case are treated as the "Correct Label". Arbitrator view should only be used by a customer who is reviewing labels or by a consultant who has assumed in the role of an arbitrator. Access labeler view by going to your task, then the Cases tab, then select your case of interest and Launch DICOM Viewer.
View comments left by labelers by selecting the comment icon in the middle of the right side bar.
Add explanations to cases by selecting the explanation box icon in the middle of the right side bar.
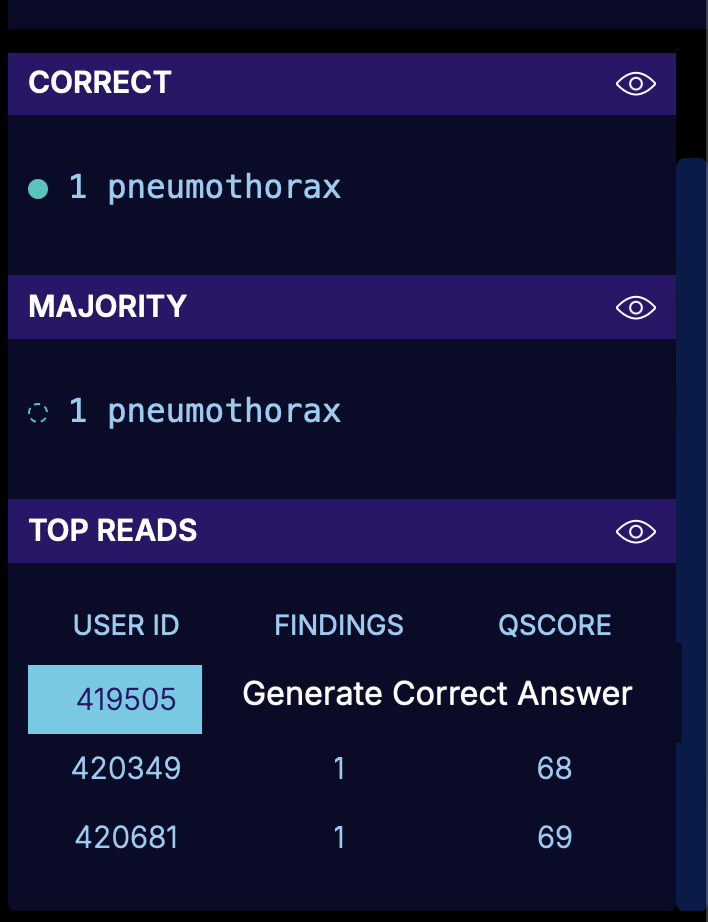
Clear the current Correct Label by selecting Clear Correct Answers. This deletes all correct answers including previously existing ones or any new correct labels drawn during your review session.
Use the eye icon on the right side bar to view or hide any of the exist segmentations. This includes:
- Correct Label: Either set by the customer or is the Majority Label that has reached consensus
- Majority Label: Aggregated label from Top User Reads
- Top Reads: Individual Reads for each User ID
To edit previous segmentations, select the User ID of interest or Majority Label then select Generate Correct Answer. This will generate a correct answer from all findings created by that User or in the Majority Label. Then proceed to edit the segmentations further, if desired.
Review information in the Labeler View section of this page for information on how to create net-new segmentations
Box, Circle, Line and Polygon Segmentation
Select Submit correct answer once you've created your label, then hit Next to navigate to the next case. Note: Any filtering applied while in theCases tab (e.g., filtered for Labeled cases) will be applied when navigating to the subsequent case
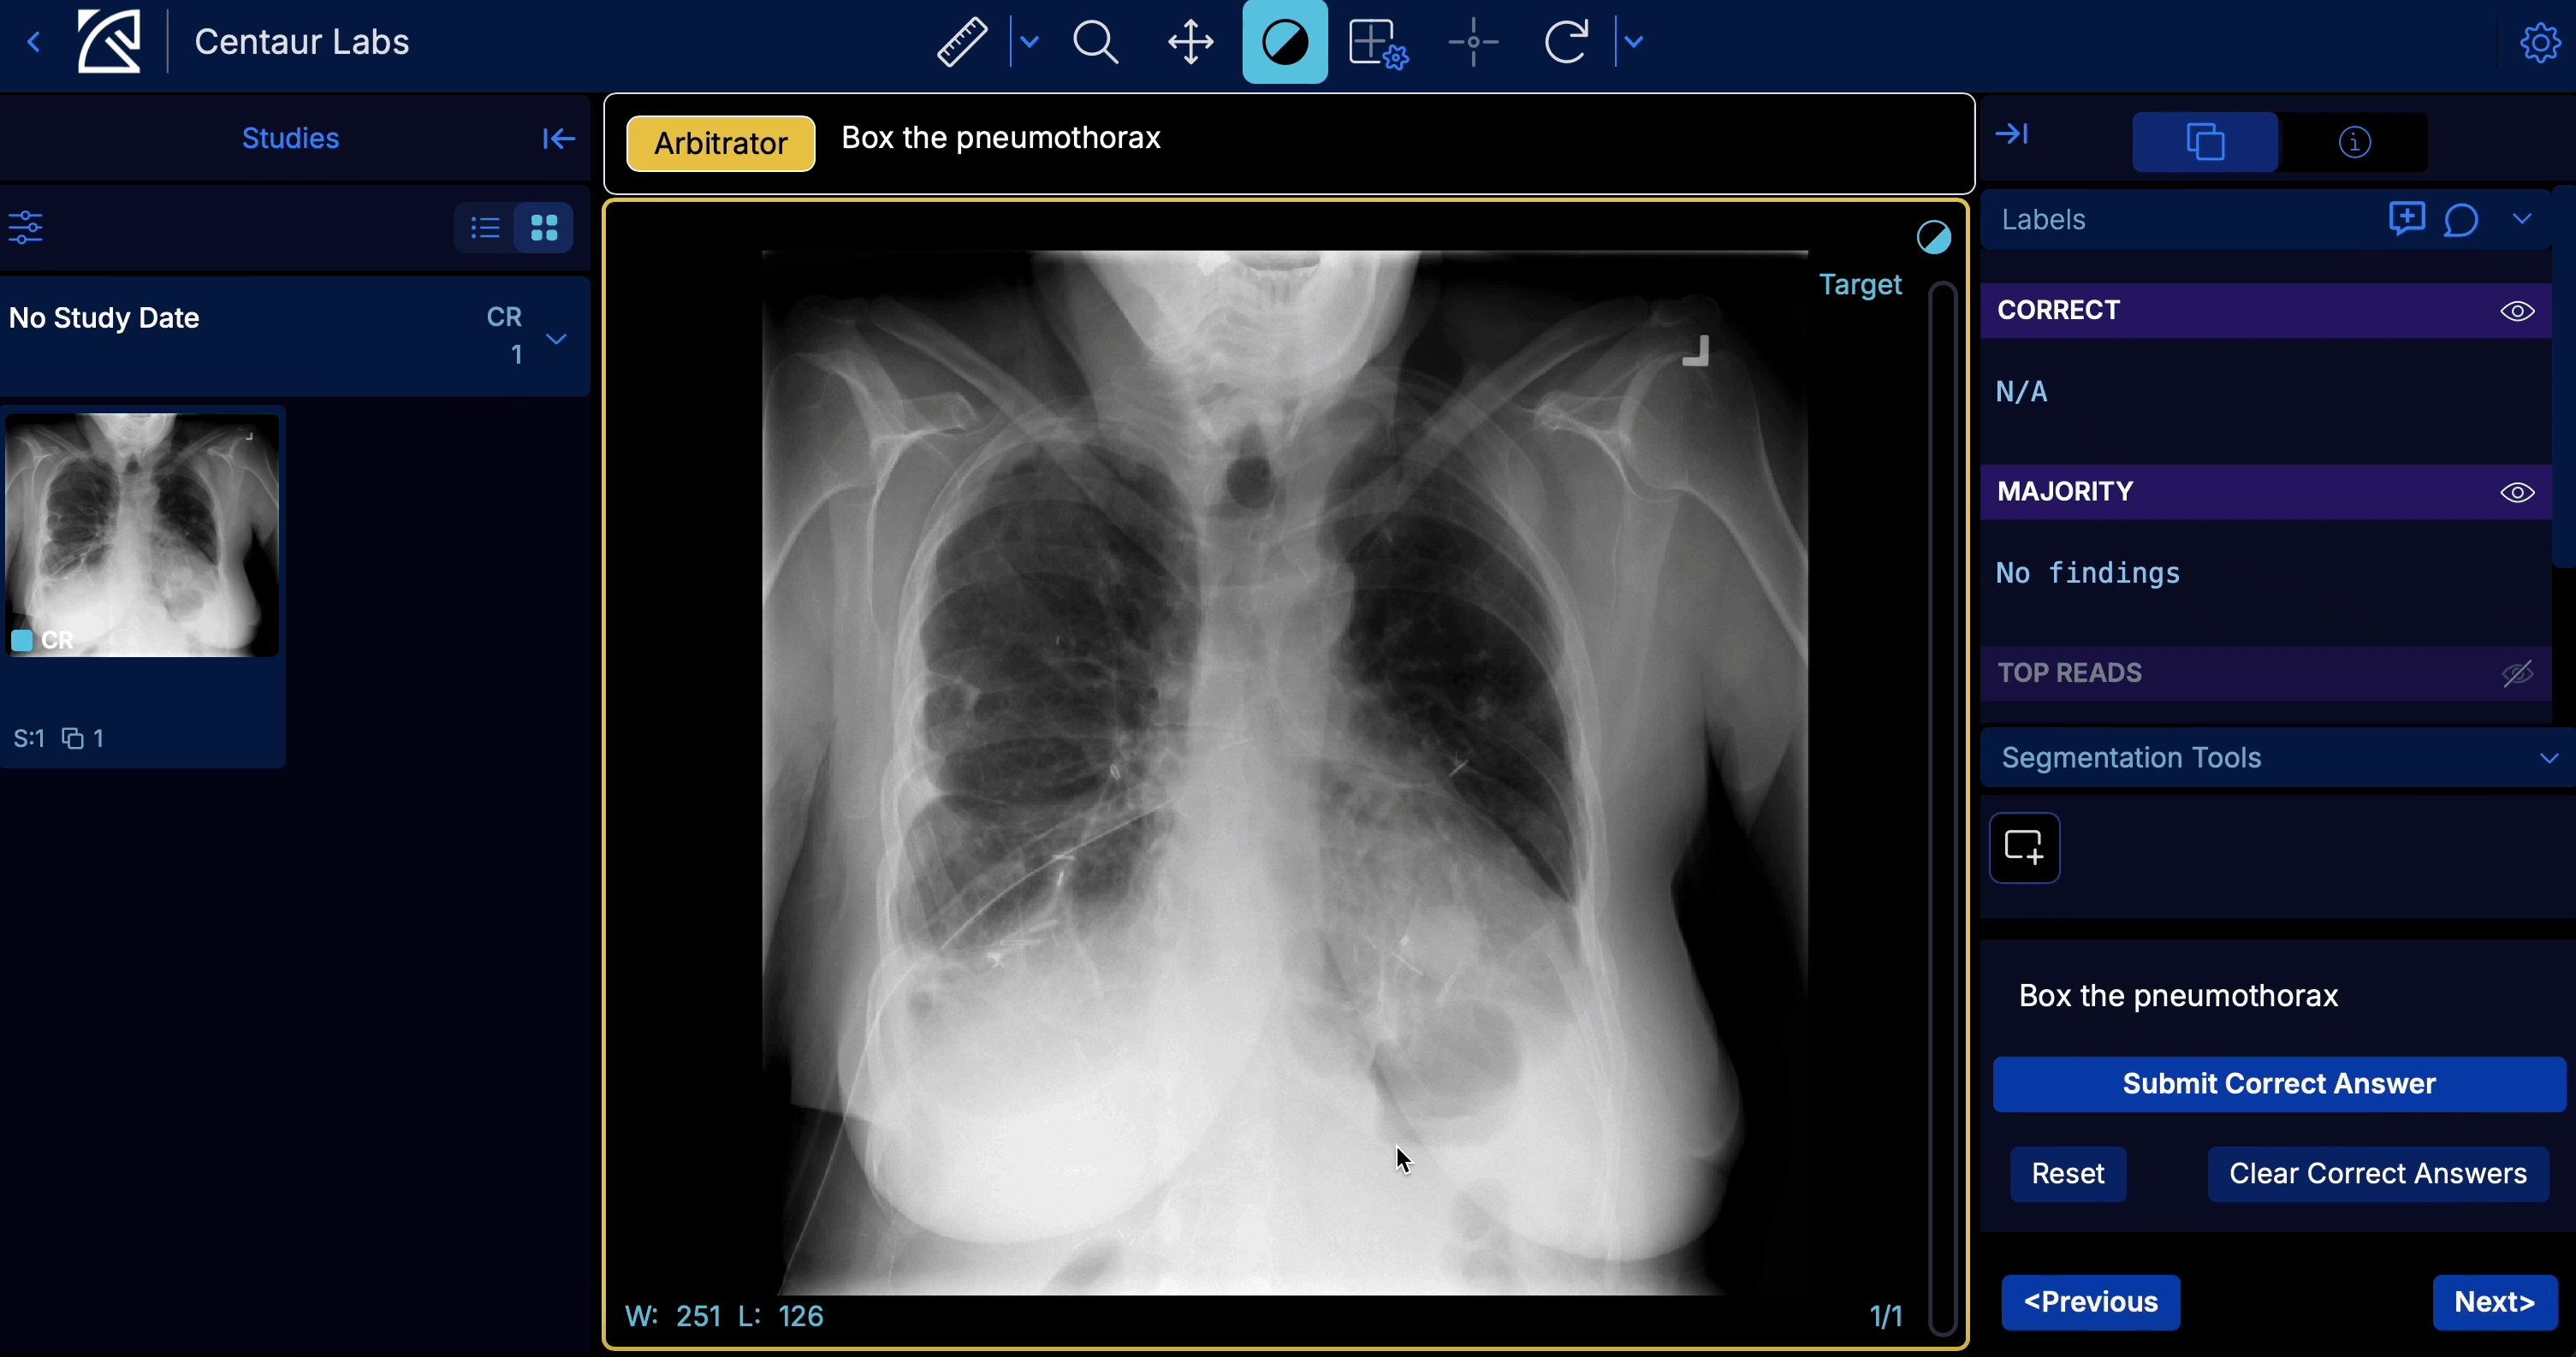
Box segmentation in arbitrator view
Pixel Segmentation
For multi-class, click on one class to display all frames containing segmentations with that class.
Select Submit correct answer once you've created your label, then hit Next to navigate to the next case. Note: Any filtering applied while in theCases tab (e.g., filtered for Labeled cases) will be applied when navigating to the subsequent case
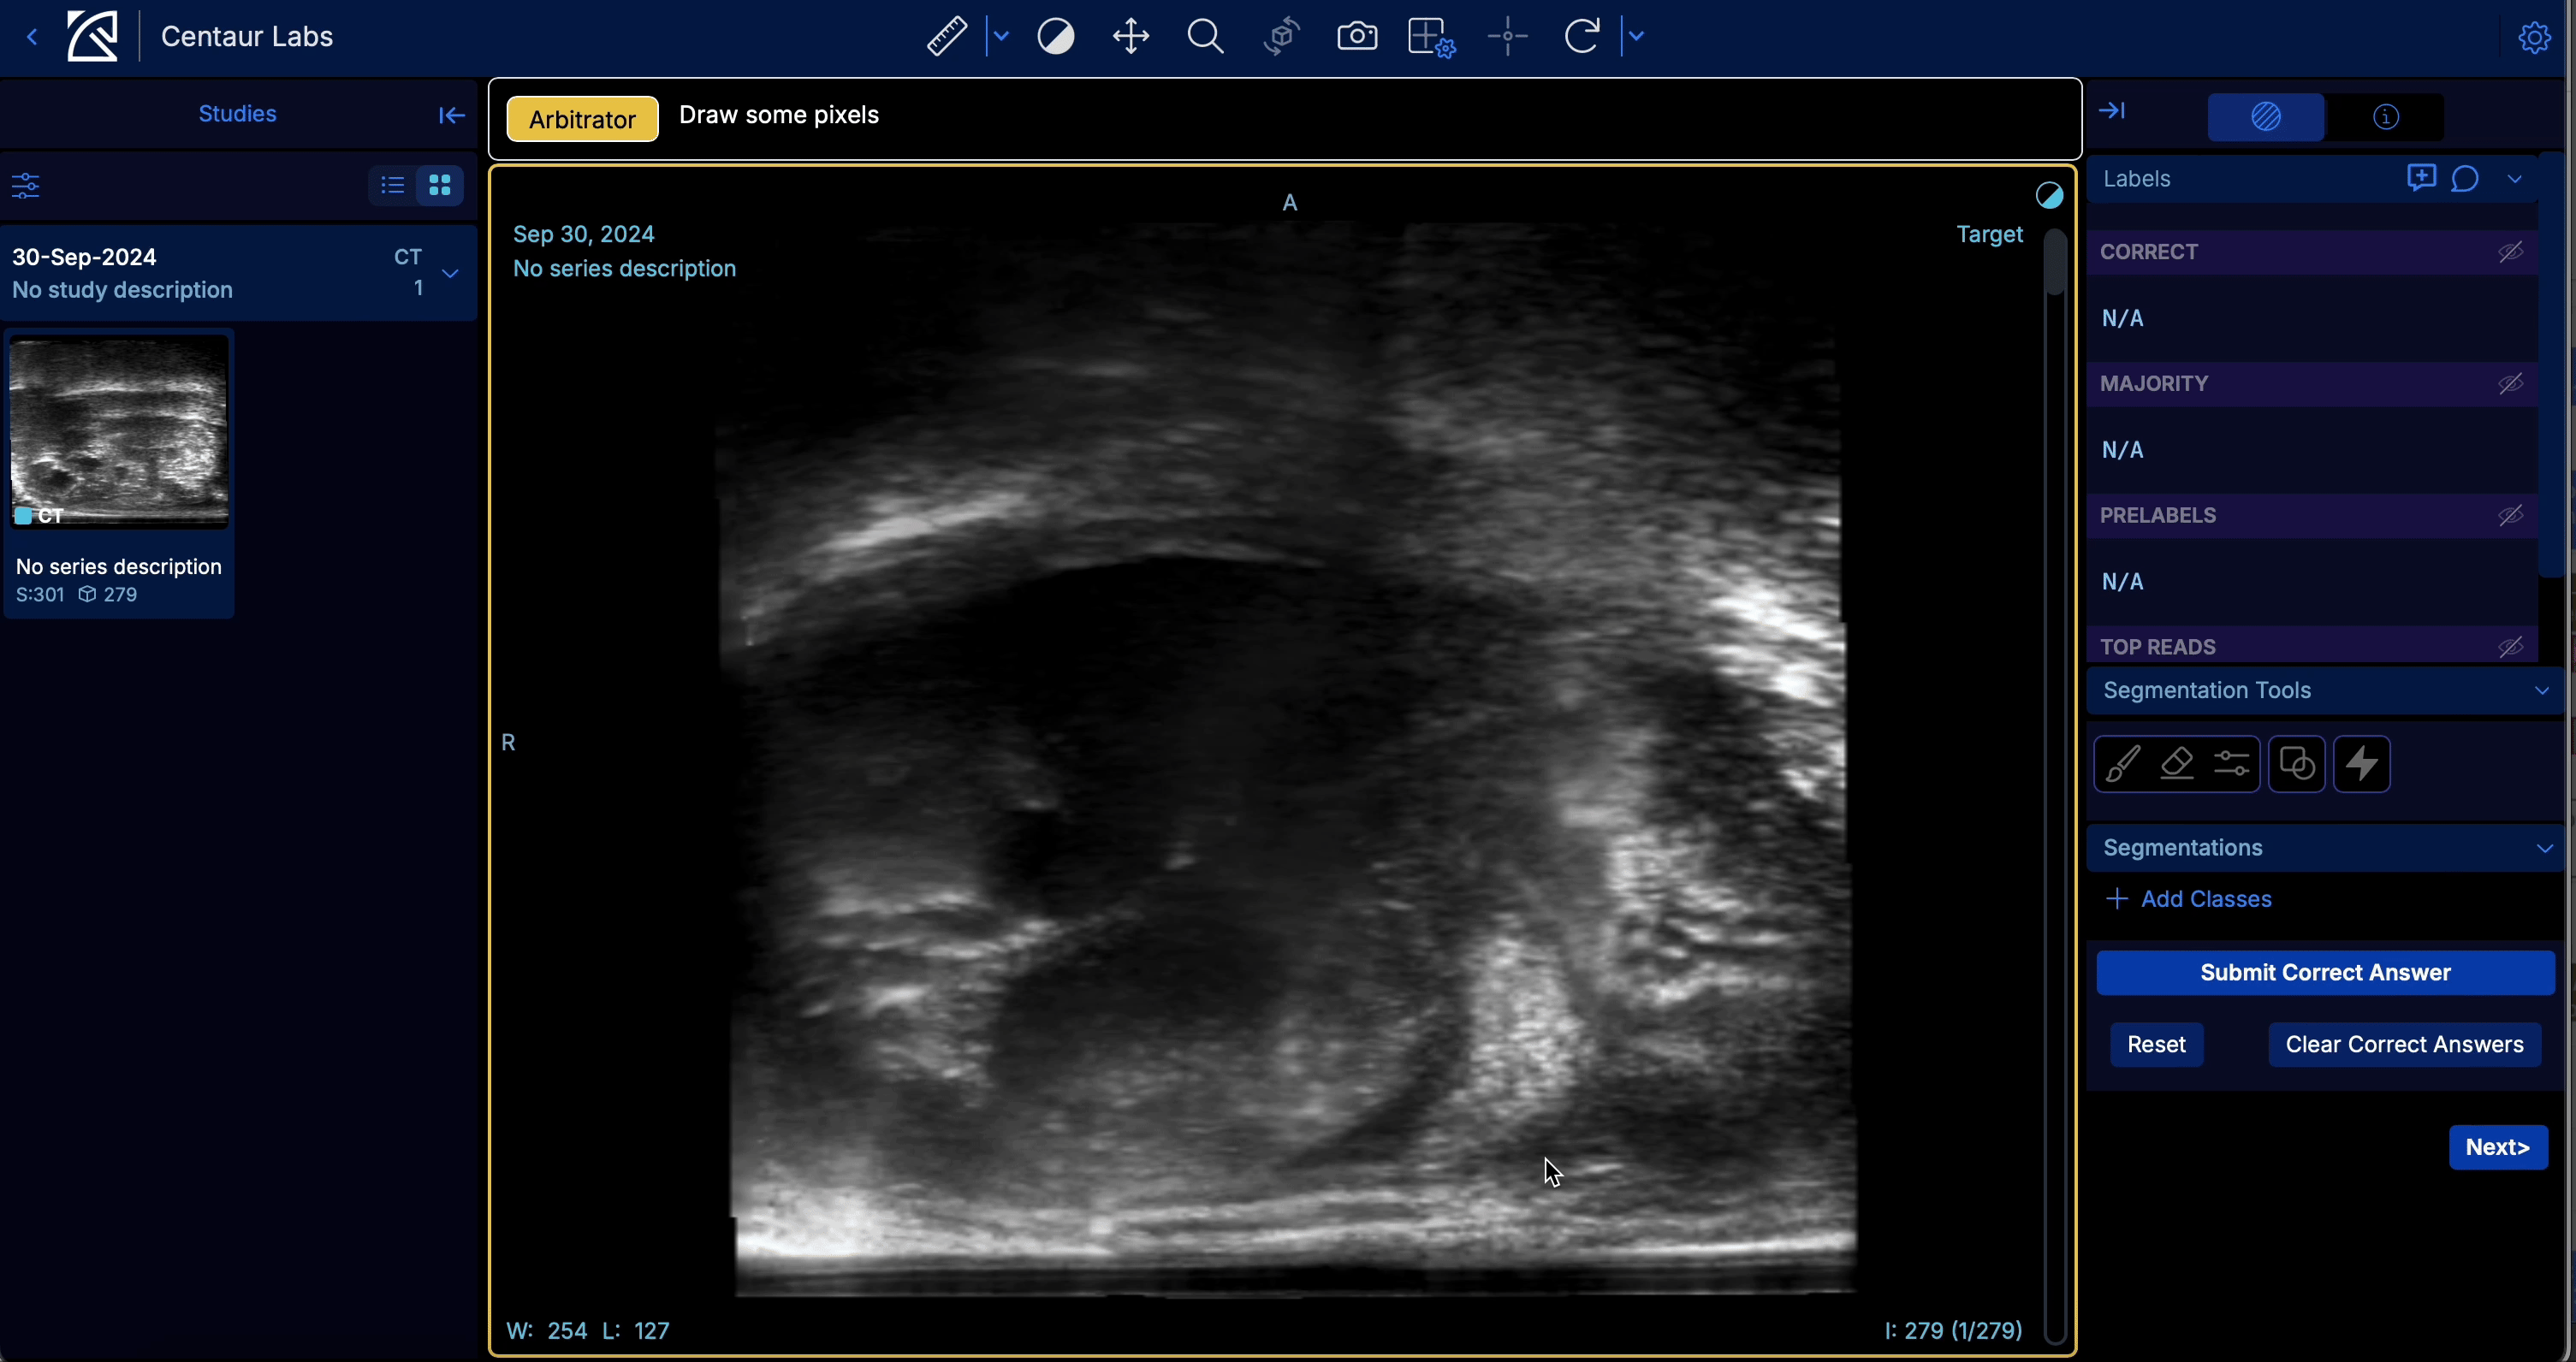
Pixel segmentaiton in arbitrator view
2D Point Segmentation
2D Point Segmentation is a task type that enables precise annotation of anatomical landmarks and key coordinates using (x, y) points. Points can be placed on any available slice plane within the Centaur DICOM Viewer (OHIF), and points are interpolated to the nearest frame, if not already placed in an original slice view, such that each point is associated with a frame, enabling spatial representation across slices.
Example use cases
2D Point Segmentation is well-suited for projects that require:
- Anatomical landmark identification: marking specific anatomical features such as joint centers, vertebral endpoints, or bony prominences.
- Implant or device positioning: annotating the location of surgical implants, screws, or other hardware on imaging studies.
- Fiducial point placement: identifying reference points used for image registration, surgical planning, or measurement.
- Key coordinate annotation: any task where the goal is to capture a precise location rather than outline a region.
How it works
- Create a DICOM Viewer task: Set up your task and select 2D Point Segmentation as the task type. Define the point label(s) that annotators will use (e.g., "Femoral Head Center", "Tibial Plateau Landmark").
- Annotate: Within the Centaur DICOM Viewer, annotators navigate to the appropriate slice and click to place a point. Each point records the (x, y) coordinates and the DICOM frame on which it was placed.
- Review and export: Completed annotations are available for review and export through the standard Centaur Labs results workflow.
WKT format
2D Point Segmentation annotations use the standard WKT POINT geometry type. Coordinates are scaled relative to the image dimensions, consistent with other Centaur Labs segmentation types. See WKT Format for details on the coordinate system.
Availability
2D Point Segmentation is currently supported in DICOM Viewer tasks only.
Support for the web labeler and the DiagnosUs mobile app is coming soon.